Ghost 6 – A Closer Look at Tinybird Traffic Analytics
In this guide, we set up Ghost 6’s new real-time analytics the manual way—installing Ghost with Ghost-CLI, creating a Tinybird account, running the Traffic Analysis Proxy in Docker, and wiring it all together so stats show up inside Ghost.
Ghost 6 has recently landed, bringing several exciting new features such as ActivityPub integration and native website traffic analytics. The release also comes with a stronger push towards using the officially prepared Docker Compose setup from the Ghost core team.
This Docker-based deployment is simple and works well for many use cases, but not everyone runs Ghost this way. Some of us still prefer the original ghost-cli method.
In this article, we’ll take a closer look at Tinybird, the real-time analytics platform that powers Ghost’s new built-in traffic tracking. We’ll explore what it is, why you might want to use it directly, and most importantly — how to manually set it up.
What is Tinybird
Tinybird is a real-time analytics platform for developers. It’s designed to collect, store, and query large volumes of event data with minimal latency. At its core, Tinybird runs on top of ClickHouse, a high-performance column-oriented database known for speed and scalability.
In the context of Ghost 6, Tinybird is the engine that powers Native Traffic Analytics. Ghost collects page view events and sends them to Tinybird, then queries the stored data to show you traffic insights inside the Ghost admin panel.
Why Set Up Tinybird Manually?
Here are several reasons you might want to set up Tinybird manually. The simplest is curiosity — you want to understand how everything works under the hood. You might also prefer not to migrate your existing Ghost installation to the official Docker method.
Another common scenario is running multiple Ghost sites on a single server and connecting them all to the same Tinybird account. This is called multitenancy, and it is supported. Each Ghost instance sends its own unique site_uuid, so multiple sites can share one Tinybird backend without mixing up their data.
Prerequisites
- A Linux-based server (Ubuntu recommended)
- Installed Ghost V6 via standard CLI method
- Docker installed – Install Docker on Ubuntu
- A Tinybird account for web analytics
- Time and patience 🙂
What Are We Going to Do?
We’ll install Ghost on our server using the traditional ghost-cli method. On our personal computer (PC, Mac, or Linux), we’ll set up a Tinybird account and retrieve the necessary API keys.
We’ll also configure a Traffic Analysis Proxy, which will forward traffic events from the Ghost front-end into Tinybird. This proxy will be Dockerized to ensure it runs reliably and automatically restarts after a system reboot.
You might be wondering: Why do we need a proxy at all?
That’s simply how the integration works — Ghost sends its analytics events to this intermediary proxy, which then securely delivers them to Tinybird.
+------------------+     +------------------------------------------+     +-------------------+
|  Ghost Front-end | --> | Traffic Analysis Proxy (Docker)          | --> |  Tinybird Backend |
|  (Visitor Events)|     | - Receives analytics events             |     |  (Stores data)    |
|                  |     | - Adds authentication                   |     |                   |
|                  |     | - Anonymizes user data                  |     |                   |
+------------------+     +------------------------------------------+     +-------------------+
Simplified schema of Ghost + TrafficAnalysis proxy + Tinybird
Let's Start with Tinybird setup
Important: These steps are done from your personal PC, Mac, or Linux machine, not on the server.
- Go to Tinybird and sign up for an account.
- Check your email for the confirmation message and click the link to verify your account.
After confirming your account, Tinybird will ask you to create a workspace.
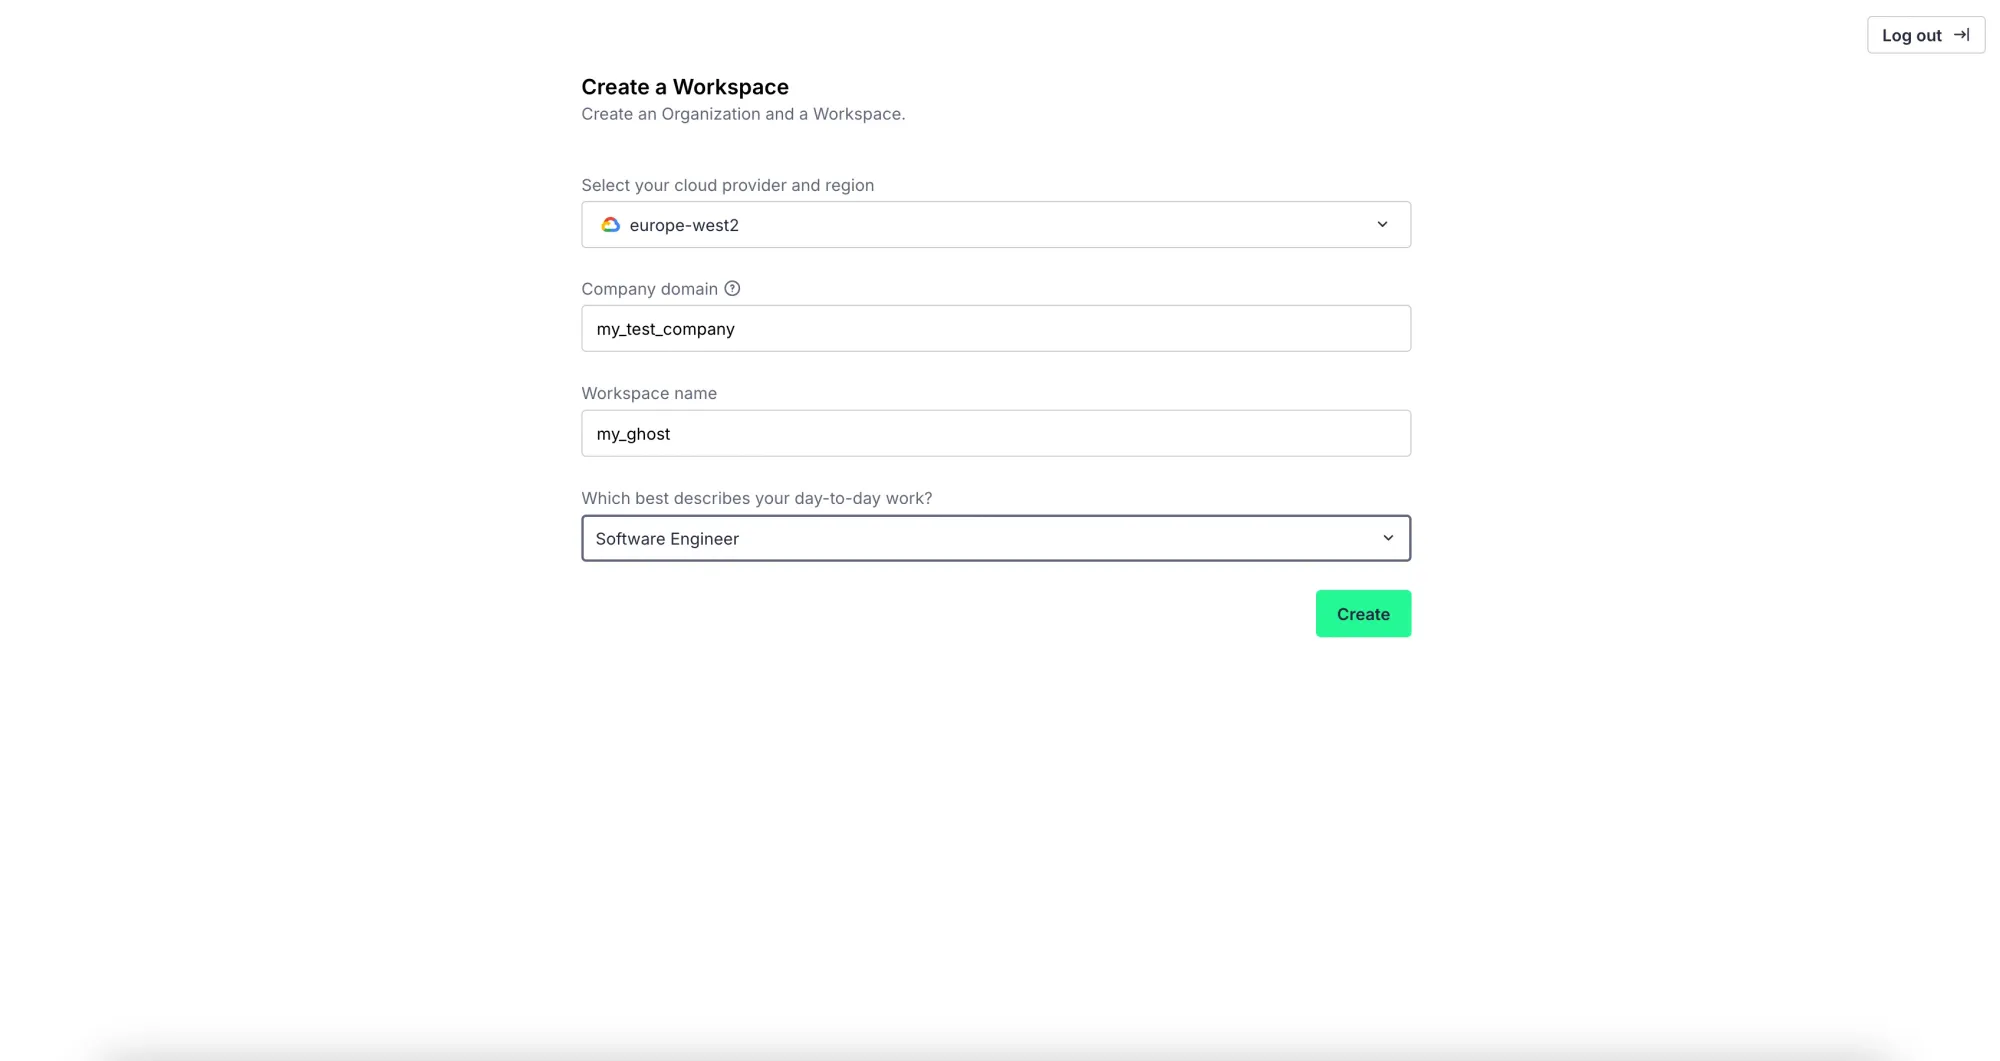
- Region: Choose the region where your analytics data will be stored. I selected Europe because it is closest to my location.
- Workspace Name & Company Domain: Fill in your company domain and a workspace name. These are used to identify your workspace and for internal organization.
This workspace will serve as the central place where all your Ghost traffic events are collected and stored.
TinyBird CLI tools installation
Next, we’ll install the Tinybird CLI on our personal machine. This tool is essential because it allows you to:
- Log in to your workspace
- Retrieve API keys and other necessary information
- Deploy Ghost’s required table schema and API endpoints to Tinybird
The CLI makes it easy to manage your Tinybird workspace directly from your PC, Mac, or Linux machine, which is critical for connecting your Ghost instance later.
For Mac/Linux machines run this command:
curl https://tinybird.co | sh
For Windows this one:
powershell -ExecutionPolicy ByPass -c "irm https://tinybird.co | iex"
Now we need to login from our Cli into Tinybird workspace:
tb login
After running the login command, your browser will open automatically. Tinybird will ask you to choose your workspace — make sure to select the workspace you created earlier. In my case it is called my_ghost
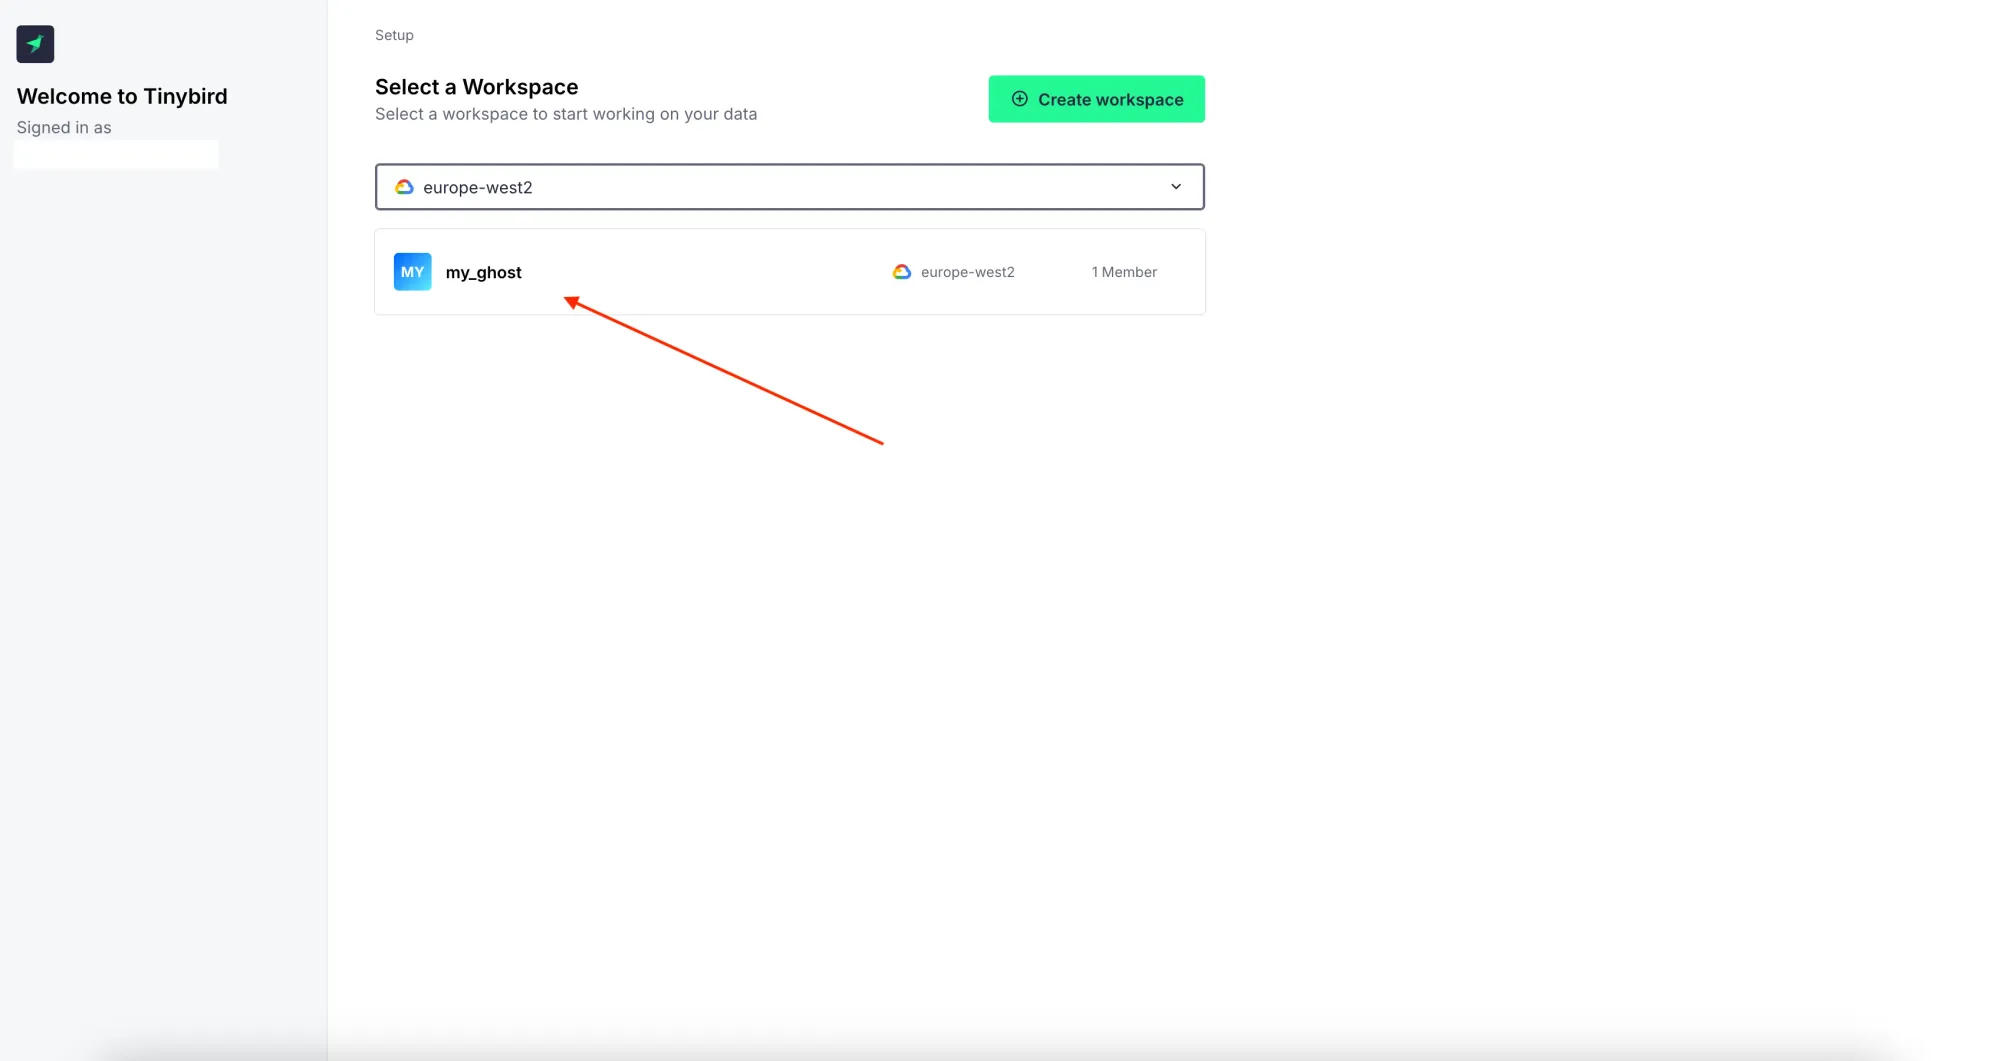
Once you’ve selected your workspace in the browser, the Tinybird website will display a success message confirming that you are authenticated into your workspace. Now you can close browser, we will continue with our terminal.
TinyBird schema deployment
Our next task is to deploy database schema and endpoints to Tinybird. Where do we take them, If you have some Ghost V6 installed locally via CLI method, you will find schema files there, precisly in this path:
your-ghost-folder/current/core/server/data/tinybird
If you don't have any Ghost installed around, you might also git clone Ghost official repo:
git clone https://github.com/TryGhost/GhostYou can find TinyBird data in this path:
ghost/core/core/server/data
Or you can use my repo containing just TinyBird folder, this repo is synced with Ghost official repo every week.
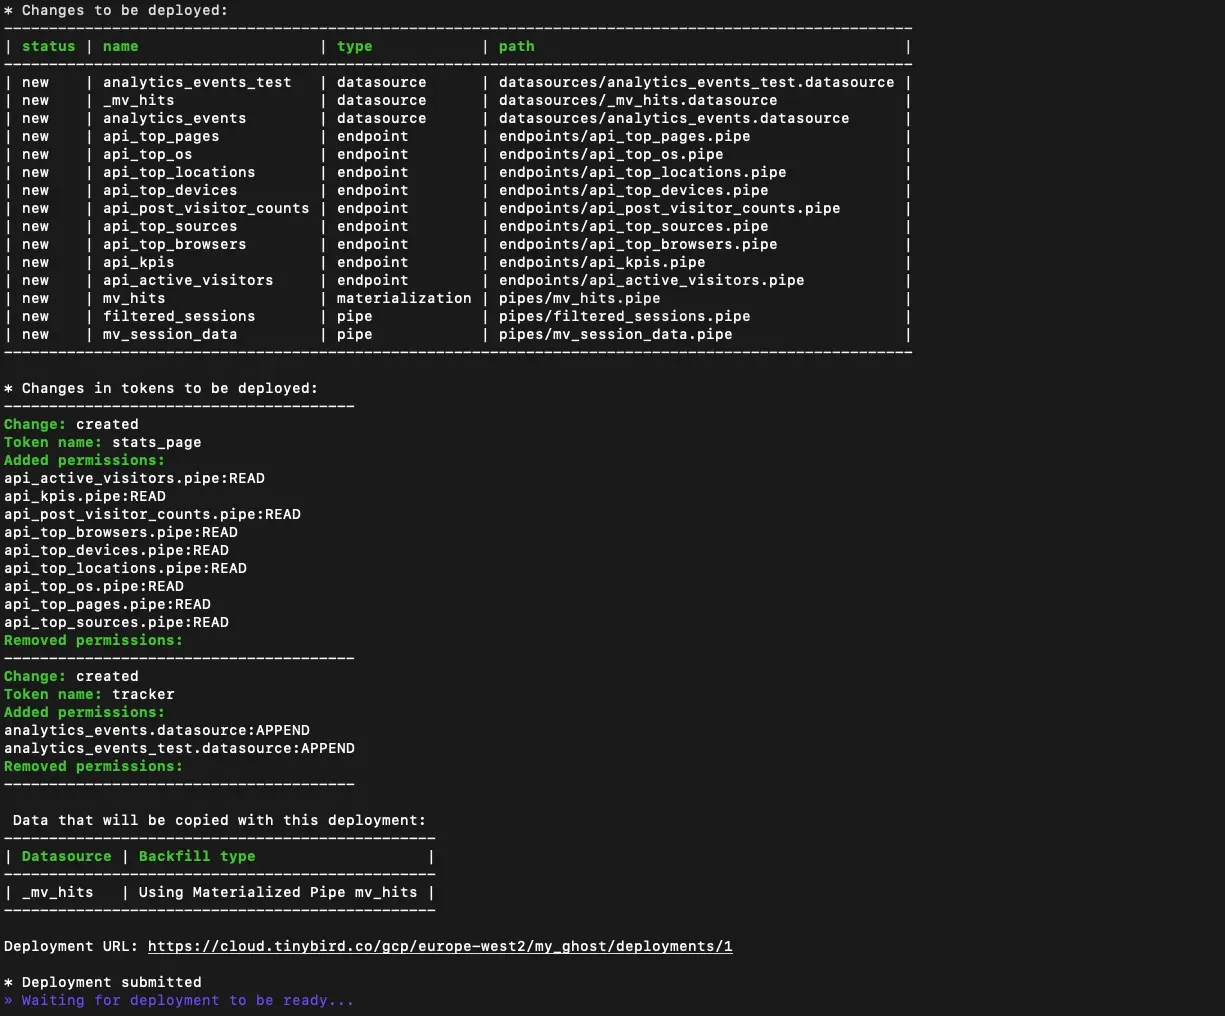
git clone https://github.com/Tom-Ravn/Ghost_tinybird_syncMove inside Tinybird folder and run following command:
tb --cloud deployYou should see message in terminal about succesfull deploy, something like on image below:
Getting TinyBird Credentials
With the tables deployed, the next step is to gather the credentials which Ghost will need to send analytics events. Using the Tinybird CLI, you should retrieve:
- Admin Token – used for workspace administration
- Tracker Token – used by Ghost to send events
- Workspace ID – identifies your Tinybird workspace
- Tinybird API Endpoint – the URL where events will be sent
These values are essential for configuring both Ghost and the Traffic Analysis Proxy, so make sure to copy them carefully and keep them secure.
Retreving Admin token by running this command (admin token will be copied in clipboard):tb --cloud token copy "admin token"
Retreving Tracker token (tracker token will be copied in clipboard):tb --cloud token copy tracker
Now we need to get info about our Workspace:tb --cloud info
You should get something like this:
----------------------------------------------------------------------------

**user:** youremail@exampl.com

**workspace_name:** my_ghost

**workspace_id:** bbdeb76a-f51e-4ff2-bffa-2a120e764d1a

**token:** p.ey...5T6M3ogQ

**user_token:** p.ey...XtyBsDdI

**api:** https://api.europe-west2.gcp.tinybird.co

**ui:** https://cloud.tinybird.co/gcp/europe-west2/my_ghost

----------------------------------------------------------------------------
You need to note Workspace_id and api
Install TrafficAnalytics Proxy on your linux server
We’ve finished setting up the Tinybird account on our personal machine. Now it’s time to go to the server where Ghost is running using the CLI method.
On the server, we’ll install the Traffic Analysis Proxy and connect it to Tinybird using the tokens and workspace ID we retrieved earlier.
Navigate into your home folder on your Linux machine. Clone following Ghost repo.
git clone https://github.com/TryGhost/TrafficAnalyticsMove into the newly created folder. For simplicity and convenience, we’ll dockerize this app, although you could also run it directly since it’s just a Node.js app. Everything is already set up, repo has Dockerfile inside so we need to excute build command.
sudo docker build -t ghost-traffic-proxy .This process will take some time — on a basic Hetzner machine it took me more than 100 seconds. Once it’s done, you can check that your Docker image is ready locally by running:
sudo docker image lsNow we need to configure a .env file with the tracker token for our new Docker image. Create a new .env file with:
touch .envNow open the file via your favourite editor, I am using mcedit here:
mcedit .env
Inside the file, add the information we retrieved earlier from Tinybird. Important: note that our API URL includes the extra route /v0/events. This is where Ghost will send the analytics events through the proxy.
#Tinybird token used for authenticating with Tinybird

TINYBIRD_TRACKER_TOKEN=p.eyJ1Ijo.....t41EBo


#Defines where the Analytics Service will forward requests

PROXY_TARGET=https://api.europe-west2.gcp.tinybird.co/v0/events

LOG_LEVEL=info

SALT_STORE_TYPE=memory

WORKER_MODE=false**%**
TrafficAnalysis .env file configuration
Now it’s time to run our Docker image with the ports open and the .env file loaded. You can do this with a command like:
docker run -d --restart unless-stopped -p 3000:3000 --env-file .env ghost-traffic-proxyNow you can test if proxy si running by visiting your server ip in your browser:
You should be welcomed by message:Hello Ghost Traffic Analytics
Setup Ghost to communicate with Traffic Analysis Proxy
Now we need to go into Folder with our Ghost instance and edit our config.production.json file,
We need to add new tinybird item into config file:
  "tinybird": {

    "workspaceId": "bbdeb76a-f51e-4ff2-bffa-2a120e764d1a",

    "adminToken": "p.eyJ1IjogIm...",

    "tracker": {

      "endpoint": "https://{your-ghost-domain}/.ghost/analytics/api/v1/page_hit",

      "datasource": "analytics_events"

    },

    "stats": {

      "endpoint": "https://api.europe-west2.gcp.tinybird.co"

    }

  }
As you can see, we added several items that we retrieved earlier on our local machine from the Tinybird setup. WorkspaceId and adminToken are self-explanatory.
tracker.endpoint is the dummy URL where Ghost will send events from the front-end. We’ll need to proxy this URL in Nginx to our Traffic Analysis Proxy.
stats.endpoint is the API URL we got from Tinybird as well.
Save the changes and restart your Ghost.
Configuring Nginx to Proxy front-end events to the TrafficAnalysis Proxy
map $status $header_content_type_options {
    204 "";
    default "nosniff";
}

server {
    listen 443 ssl http2;
    listen [::]:443 ssl http2;

    server_name nikixnet.com;
    root /var/www/ghost/system/nginx-root; # Used for acme.sh SSL verification

    ssl_certificate /etc/letsencrypt/nikixnet.com/fullchain.cer;
    ssl_certificate_key /etc/letsencrypt/nikixnet.com/nikixnet.com.key;
    include /etc/nginx/snippets/ssl-params.conf;

    location ~ /.ghost/activitypub/* {
        proxy_set_header X-Forwarded-For $proxy_add_x_forwarded_for;
        proxy_set_header X-Forwarded-Proto $scheme;
        proxy_set_header X-Real-IP $remote_addr;
        proxy_set_header Host $http_host;
        add_header X-Content-Type-Options $header_content_type_options;
        proxy_ssl_server_name on;
        proxy_pass https://ap.ghost.org;
    }

    location ~ /.well-known/(webfinger|nodeinfo) {
        proxy_set_header X-Forwarded-For $proxy_add_x_forwarded_for;
        proxy_set_header X-Forwarded-Proto $scheme;
        proxy_set_header X-Real-IP $remote_addr;
        proxy_set_header Host $http_host;
        add_header X-Content-Type-Options $header_content_type_options;
        proxy_ssl_server_name on;
        proxy_pass https://ap.ghost.org;
    }

    # ADD this section: Analytics proxy with prefix stripping
    location ~ ^(.*)/\.ghost/analytics(.*)$ {
        rewrite ^(.*)/\.ghost/analytics(.*)$ $2 break;

        proxy_pass http://127.0.0.1:3000; # Our docker proxy
        proxy_set_header Host $host;
        proxy_set_header X-Real-IP $remote_addr;
        proxy_set_header X-Forwarded-For $proxy_add_x_forwarded_for;
        proxy_set_header X-Forwarded-Proto $scheme;

        add_header X-Content-Type-Options $header_content_type_options;
    }

    location / {
        proxy_set_header X-Forwarded-For $proxy_add_x_forwarded_for;
        proxy_set_header X-Forwarded-Proto $scheme;
        proxy_set_header X-Real-IP $remote_addr;
        proxy_set_header Host $http_host;
        proxy_pass http://127.0.0.1:2368;

        add_header X-Content-Type-Options $header_content_type_options;
    }

    client_max_body_size 1g;
}
This Nginx block takes all requests to /.ghost/analytics and sends them to our Traffic Analysis Proxy running on port 3000. It keeps the client’s IP and original host information so the proxy knows where the request came from. The block also adds a small security header. Basically, it makes sure that all Ghost analytics events are correctly forwarded to the proxy.
Now restart Nginx and test it out, you should see first data coming into your Ghost admin dahsboard and also into your Tinybird account.
To Wrap it Up
So that’s it — we’ve taken a closer look at how Ghost’s new analytics feature, powered by Tinybird, works under the hood. Ghost’s preferred way of deploying with Docker Compose hides most of the complexity from the user, which is great for simplicity, but today we went the manual route.
In a nutshell: we set up Ghost the good old way, created a Tinybird account, made a new workspace, and installed the Tinybird CLI tools to deploy the schema. We grabbed all the tokens and API endpoints we needed, cloned the TrafficAnalysis repo on our server, and dockerized it. Then we created our .env file with the tracker token and API endpoints, updated Ghost’s config.production.json to include the Tinybird section, and configured Nginx to proxy front-end events to our Traffic Analysis Proxy. Quite a bit of work, but now you know exactly what’s happening at each step.